Thursday, November 1, 2012

The Fly Cutter

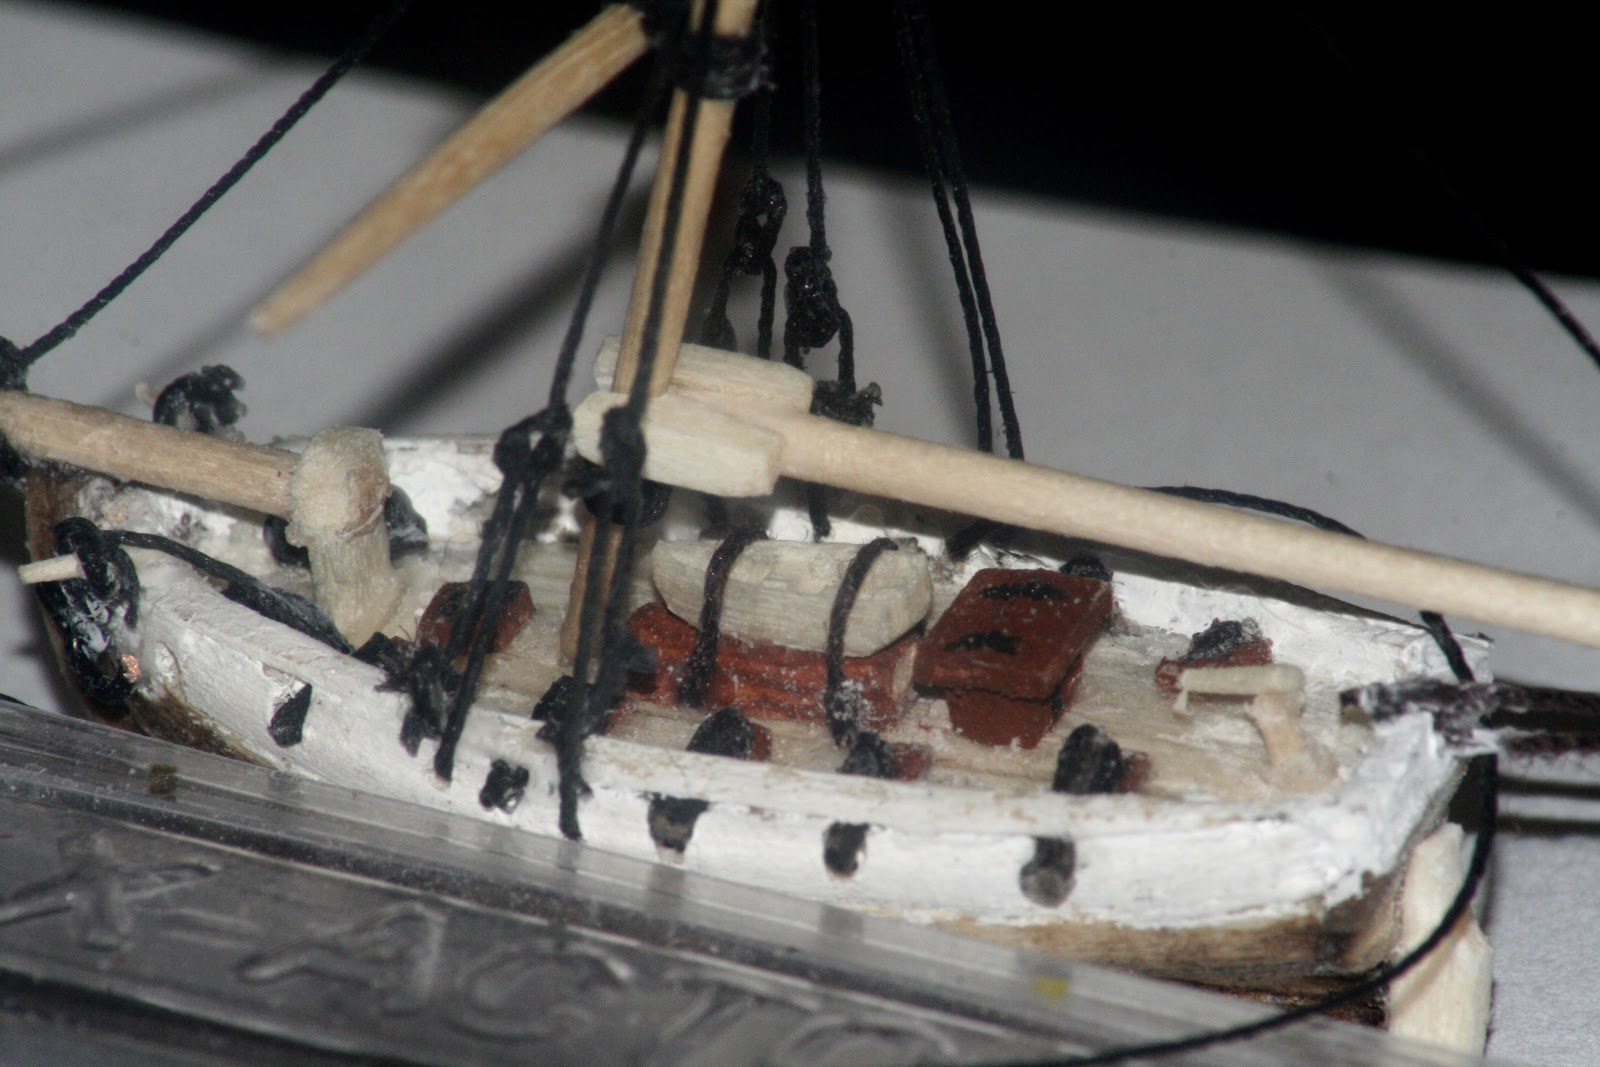
I recently completed a ship from The Story of Sail by Richard Woodman and Veres Laszlo.  The Fly was a ship purchased in 1763 by commissioned by the British Navy to catch smugglers on the English Channel. The large sails made her able to move swiftly in light winds.  I would post a picture of the plans but I really don't want to infringe on any copy rights.  I do however highly suggest you check out the book Story of Sail. It has a over a thousand plans and great ideas from the beginning of sailing history to modern day.


I used a couple of new techniques on this one first of which was how I created the hull.  Usually I carve the hull from a solid piece of wood but this time I tried an idea from David Luna de Carvalho.  Check out his blog here.  http://mardasgarrafas.blogspot.com

I first made a copy of the plans out of the Story of Sail and glued them onto pieces of cardboard.  I would have used wood but I didn't have enough at the time.  I glued the pieces of cardboard onto a wooden keel and this is what I got.


I then used match sticks to plank the hull like what was done on the real ship.  The trick is using an exacto knife to cut the match sticks thin.  Then soak them in water so they become pliable.  Once they started bending pretty well I glued them to the card board.  After I got the planking was done I cut out the middle of the card board and planked the deck.  


After getting the deck in I added the masts and deck details.  At first I planned on using a helm but David pointed out that cutters have tillers so I later changed it out.  Helps to have friends that know what their doing.


The other new technique I used is called thread blocking.  Since it's impossible to find block and tackle small enough for a ship of this scale thread blocks are created to act as such.  It's hard to explain how to do this with out being able to see it.  Luckily John Fox III created a great video that shows how to make them and how they work.  I was going to embed the video but it's on Vimeo and wouldn't cooperate.  See it by clicking this link.  http://vimeo.com/46158123


Notice the long boat from my other post.  Ready the Longboats!


I used thread blocks on the bow and to rig the gaff and boom to the main mast.  I ran the gaff and boom line out the side of the hull.  This allowed me to put the rear sail into the bottle first.  Once the mast was up I tightened the lines pulling the boom and gaff onto the mast.  It sounds simple enough in theory but it took an hour to do just that.  In total it took three hours to get this ship set up in the bottle.  The final result was well worth it.


I wish I could show more but I sometimes get too involved building to take pictures.  Thank you for reading!  

Friday, October 19, 2012

Ghost Ship in a Bottle

I've completed two ships since my last post so I thought it's about time to post something about one of them.  This one comes by popular demand.  The Ghost Ship in a Bottle.


 I came up the idea while on the yahoo forum.  Some one mentioned lighting a ship up with UV lights.  I decided to explore the idea.  I talked to a friend who had some UV LED's and we found that the purple tinted UV lights will not show through a dark root beer bottle but the light bouncing off of a white surface will.  So then I took it a step farther and used glow in the dark paint which lights up quiet nicely under the UV light.

I didn't get any pictures of the ship before I put her in the bottle.   The build went fast since I wasn't worried about to many details.  So assuming you've already built your ship paint it with glow in the dark paint.  I just got some acrylic paint from Walmart for two or three bucks and it works great.  I painted almost everything. The sails, the lines, the hull, the masts.  The only thing I didn't paint were the cannons and the anchor on the front.  The idea behind this was to let the light around it glow and the cannons and anchor would appear as just a silhouette creating a more dramatic look.  As you can see the anchor worked fine but with out a second LED behind the ship the cannons are out of sight.

Another part of building this ship was the holes in the sails.  I used a canvas type cloth for the sails. Pinching small sections I used scissors to cut holes and give it the well weathered ragged look.  I then just let it fray as canvass does and painted it all in glow in the dark paint.  


Now the fun part.  How to make it work.  First get yourself some UV LED's.  I just went to Radio Shack.  They were helpful in letting me know what I needed.  If you want them cheap go on eBay.  You can buy 300 for less then $5.  I don't know if some are better then others I just made sure they were Ultra Violet LED's.


Along with your LED's you will need a power source.  You will have to check the specifications of your LED's to see whats right for what you have.

You will also need a resistor.  Chances are your LED will be like mine and it won't light until it hits 3.7 volts.  Now try to find a 3.7 volt battery but don't go over the highest specification which is under 6.  Doing so will burn out your LED.  Since there was no such battery so I got a six volt battery and used a resistor to bring it down to the required maximum voltage.  Here's a tool to help you do that. http://ledcalculator.net/

I then searched YouTube to help me figure out how to put everything together.  Here's the video I used.  It's a bit long so skip to the parts you need.  The important thing is he helps you understand how to identify the negative and positive parts of an LED and where the resistors should go.  Best place to start is the two minute 21 second mark.


Now that you've got the wiring figure out it's time to build it into the bottle.  I decided to use the cork to hold my battery and my LED in place.


Here you can see the wire that connects to positive side of that battery and completes the circuit.  It's a very crude method but it works.  Some one with more skill and means can definitely make an improvement.


 A few more shots to give you an idea of how I put it together.


My original plan was to put an LED behind the ship as well so it would be lit from two sides showing front and back.  I got it for about two seconds before I lost the connection.  I'll keep trying.  Some one suggested drilling holes in the bottle with a ceramic drill bit.  I may try that.  With or with out the other LED I think she looks great.  The light you see around the ship is white caps I painted with the glow in the dark paint.  I tried to make the sea stand out a little.

   
She definitely stands out in the collection.


  My wife is currently writing a short story behind the Ghost Ship in the Bottle.  Once it's finished she may post it to her writing blog.  To read her blog please go here. The Ghost Ship in a Bottle

If you do plan on building a ghost ship in a bottle I would love to know how it turns out.  Email me a picture at siemensbottleingco@gmail.com.  Thank you for reading!  

Wednesday, September 19, 2012

Talk Like a Pirate Day

Warning to all my good friends that are just into SIB building for the ships and don't care about certain people who sailed them you may want to skip this post because today I'm talking about...


It be talk like a pirate day and though I be a bit of a mangy land lubber I twill be enjoying it.  Truth be told this be my type of holiday.  I read a line on the Talk like a pirate day website http://www.talklikeapirate.com/piratehome.html that said, "the point is there is no point."  And that's just it.  If there ever t'were a day to celebrate the ridiculous and down right fun this be it lads.  So grab ye a bottle and a cutlass and let us talk like pirates!

For those that have not heard the tale, talk like a pirate day came in to be'n in 1995 when two scaly wags named John Baur and Mark Summers were playing a game o racket ball.  They t'weren't the most fit of pirates and many an arrr was heard that day while swinging away at that scurvy ball.  This turned into more pirate lingo and they had such a good time they made a day of it and celebrated talk like a pirate day among friends for many a year after.  In 2002 they contacted a columnist and gentleman of fortune by the name of Dave Barry with the idea.  Dave loved it and wrote out the story in a column and the international talk like a pirate day spread like a flock of seagulls before a fly'n cannon ball.  I won't be go'in to the full story but if ye want to spy more on the tale see the afore mentioned website.

I've always enjoyed pirates and it t'was Pirates of the Caribbean 4 that got me into ship in bottle building.  So thought I, it be only natural that I do a talk like a pirate day post.  I thought about showin how to build a pirate ship in a bottle but since I had so recently done that with the Adventure Frigate I set my weather eye on try'n somethin else.  So here be my own tips and tricks to talking like a pirate.

I often hear such lines as "you scurvy dog" and "avast mateys"  put into every day sentences and it always just sounds just a little weak to me.  Like, "Ahoy you scurvy dog there is the doughnut shop what do you say we plunder us some doughnuts."  It's good but I think it could be just a bit better.  Here's how.

There are three simple words that if switched with three other simple words will improve you pirate speakin abilities from being just a simple man before the mast to a true captain.  These words are "is" "it" and "you" and are switched with "be" "that" and "ye".  For example "Arrr you scurvy dog, it is the one!"  Becomes "Arrrr ye scurvy dog, that be the one!"

Then the afore mentioned sentence becomes, "Ahoy ye scurvy dog that be the doughnut shop what say ye plunder us some doughnuts."  Not only does it sound more piratey but now your talking your friend into getting you doughnuts instead of helping in the plunder.  Ye have now risen to the rank of Captain.

Now if ye be addin these three words to the other pirate phrases found through out the endless seas of the internet ye soon be talkin like an old sea dog.  So go have a fun talk like a pirate day ye gentlemen of fortune and thank ye kindly for readin this here blog.  Enjoy the below video it be my new favorite tune.


Sunday, September 9, 2012

Ready The Long Boats!

I stumbled across a new technique while digging through the photo's on the Yahoo forum.  I won't mention which one since SIB builders on the forum are a humble folk and don't usually take a liking to drawing attention to them selves and this blog is very public.  Did I just say take a liking?  Wow too much study for my up coming talk like a pirate day post.  Any way if you want to find the inspiration for this post dig into the yahoo forum photos and you'll find it.  As well as a lot of other inspiration, the yahoo forum files and photos have a lot of good stuff.  

So this post is all about turning a match stick...


...into a long boat small enough to fit on a dime.


Long boat's, dingy's, life boats what ever you want to call them they are a fun accessory to ships in bottles.  Trouble is making one small enough to look the part.  Here is a fairly quick and easy method.  I say fairly because lets face it your dealing with super small parts and it can get tricky.

First take your match stick and mark out the size you want your boat.


Then sand the end.  It is important to leave the boat on the match stick at this point since it gives you a place to hold on while you cut and sand.


Next use a dremel to cut the spaces between the seats.  I usually use three cuts but do what you think looks right.  


The end result should be something like this.


Once that's done sand down the middle seats so they're just a little bit lower.  This makes it look like they are seats in the bottom of the boat.  


Now get out a separate match stick.  This one will be used to create the side of the boat.  Use a razor blade to cut a paper thin strip of wood.  This may take a few tries.  


Cut out two small strips.  


Cover the whole side of the ship with glue and glue the strips onto the sides.  This is important since you'll be sanding on the boat and if they aren't glued tight they can come off.  Also glue the strip so it sicks up a little above the top of the match stick.  You want it to look like you can actually sit in it.  


Now sand the boat into shape.  This is one of the hardest parts since it is so small so be patient with it.  


It is finally time to cut the boat off the match stick and do the final touch up sanding.  You may need to add another strip of wood to the back as well to match the height of the sides.  


Once the boat is off the match stick it will be much harder to handle so try to do most of the sanding while it's on.  As far as the back of the boat goes I like to taper up the bottom and sides just a bit to give it a good shape.  Pretty much just make it look like a boat.  


Congratulations your done!  From here it can be painted stained or just glued onto the ship.  


Thank you for reading and have fun building!

Saturday, August 18, 2012

Adventure Pirate Frigate

I was thinking of coming up with a new blog post and trying to get pictures of my latest build when it dawned on me.  I had not yet posted pictures or explained the finishing touches of what I have now named the Adventure Pirate Frigate.  I decided on the name because I used many new techniques and it was quite the adventure putting her all together.


One of the important parts of building this ship is how I attached the masts.  I explained in my first post of The Dawn, so named because it is the first ship of this blog, the hinge method of attaching masts to the ship.  While that is a great method it would have been impossible to use on the Adventure Pirate Frigate because of how much ship I was fitting through such a small hole in the bottle.  Through some research and talking to people on forums I found there are actually several methods to attach the mast.  I'll go over a few of them.

Michel Bardet is a french SIB builder who has built for over 40 years.  His SIB's are absolutely incredible and have won several awards.  If you haven't seen his site please visit it here  http://michel.bardet.pagesperso-orange.fr/indexa.htm.  The reason I bring this up is because his site also has a lot of great building techniques that are easy to understand and it's where I got this picture.


These are five different techniques of attaching the mast.  I'll quickly explain each one.

The first method is to drill a small hole in the deck and place the mast in.  This can be tricky with your back stays.  If the hole is shallow the mast will slide right in and the back stay's will remain tight.  To deep and it's hard to get the mast's in unless the back stays are detached from the ship.  It does however create a realistic look in that there are no hinges or anything showing how the mast got into the bottle.

Second method is drilling a hole through the ship and having a guiding line that pulls the mast into place.  This can be tricky since it's adding more stings coming out of your bottle and if you get to mixed up your sunk.  Which is what happened when I tried this method.  It is great though in that the masts can be removed completely from the ship and even put in the bottle separately.

Third is making a very shallow hole for the mast.  I haven't tried this one but I assume you need to have tight stays to keep the mast in place.  This would allow for the masts to be inserted separately as well.

Fourth is the hinge method.  Your masts are held down by a hinge and are pulled up using the forward stays. This is the most common method and is a great place to start.

Fifth is what is known as the Hinkley Hinge so named after Jack Hinkley who invented it.  I have not personally tried this one either but I see it as a definite upgrade to the regular hing method.  It keeps the mast perfectly straight as it raises up unlike the regular hinge that may fall off to the side.  It also hides the hinge creating a more realistic look.

The reason so many different styles is important is because one style may not work for the type of ship your building.  For instance I mentioned earlier my usual hinge method would not work for the Adventure.  This is because with the multiple decks I had no space to fit the masts all stacked up on deck connected to hinges.

It's important to remember there is no wrong or right way to SIB building.  It's like painting with water colors as opposed to oil paints.  You use what works and what gives you the best result for what you are trying to portray.

So with regards to my Adventure Pirate Frigate here is how she looked before going into the bottle.  


Here you can see my split hull and my two forward masts completely separated from  the ship.  The mizzen mast was small enough to fit with the hull so I used the first technique shown in the picture above and drilled a shallow hole for the mast to go into.

The tricky part of this method was the rigging.  The forward stays ran through the forward masts while the back stays were glued on after the ship was placed in the bottle.  I drilled deep holes in the mast that helped guide my split hull pieces together and held the masts straight so the back stays could be positioned correctly.

I also used a different method in that I hung the ship from a string through the cork allowing the ship to appear to float in the bottle.  I like this method because it is easier and cleaner then trying to get clay or putty into a bottle and it allows you to see the entire ship and not just above the water line.  The idea came from a feature by Greg Alvey at Folkartinbottles.com.  Here's the link.  http://www.folkartinbottles.com/featured/114-suspended-models

In conclusion the Adventure turned out well and was a lot of fun to build.  Here is the pictures of the final result.


And a little fun with Photoshop.


Keep building and exploring new methods and thanks for reading.  

Monday, June 25, 2012

Split Hulls and Deck Accessories

I'm back!  I have a lot of material from my current build to go over so this will be a some what extensive post. I want to cover a couple of things this time.  First split hulls and then how to make some deck accessories that will add detail to the ship.  

This is the beginnings of my current build which is the most cliche ship of all time, the pirate frigate.  It would take a blog post in and of its self to explain all of the carving that went into this hull but for this post the important thing is the split.  

Here is the ship split.  Splitting the hull enables you to put a bigger ship into a smaller bottle.  This gives the illusion that there is no way the ship could fit in the bottle much less the mast and sails.  With this ship I've used the channel to hide the split.  The channel is the raised section of wood that goes horizontally across the hull.  The channel is used to keep the stays from rubbing against and breaking the rails of the ship.  When the ship is put together the channel will hide any creases between the split.  

This is after I applied the paint.  I use acrylics mainly.  It's easy to clean up, cheap, and it looks good.  In order to create the fine lines of gold paint I dipped the very tip of a toothpick into the paint and applied it by drawing it on like a pen.  Where it was over applied I let it dry and put the brown paint over it until it looked right.  The hull still splits it is just stacked on top of the other in this photo.    

These two shots show more of the deck.  I drew in the planking with a fine point sharpy.  I also added a hatch and a long boat.  I regret that I didn't get more pictures of these before gluing them in.  I will try and go over them more in a later post.  The hatch is made in much the same way as the other parts.  I painted lines across the hatch vertically and horizontally so it looks like a grate.  I then used my fine point sharpy to fill in where the holes in the grate would be.  I then glued a frame around the hatch and sanded it down so it wasn't coming up to far.   My general rule for applying more wood to any section of the ship is to add more and sand down rather then to get it perfectly cut the first time.  

As for the long boat I cut out a small block of wood and sanded it into shape.  I sanded off the corners in the front first then rounded the bottom finally rounding up the front and back.  This will take time and patients since the boat is so small.  I don't worry about carving out the inside it's to small for that.  I turn it upside down and glue it onto the ship.        

The next thing I want to go over is anchors.  I love putting anchors on my ship.  I like the detail they add.  I make all of my own anchors out of wire.  This way I can make them the exact size I need in order to fit my ship.  This is especially helpful in ships of this scale since I've yet been unable to find anchors that you can buy for such small ships.  I've outlined all of the steps below. 

Your going to need a set of needle nose pliers to do this the smaller the better.  Use plenty of wire you'll be cutting off the excess in the end.  Clamp the wire in the middle.             


Then simply fold it in half. 


Clamp the wire together just below the end.  The top portion that is not clamped together will make the eye of the anchor.  


Then decide on the size of your anchor.  For bigger sizes I like to twist the wire together for added strength.  When you get real small this become impossible.  


You then want to bend the ends around the needle nose.  The closer you get to the end of the needle nose the smaller the loops will be so use that to decide the size you want this part of the anchor to be.  


 Then trim off the ends and make final adjustments according to how you think it should look.  Another SIB builder who I shared this idea with added a little strip of wood on top that is consistent with real anchors.  I didn't add this until I saw how well her's turned out and have since included it.  It can be a pain to get it to glue just right.  As always have patience and keep trying.


 I now want to go over a very popular accessory to ships the cannon!  A pirate ship would not be a pirate ship if it did not have cannons.  I use two methods of canons on this ship the first is the cannons in the side of the ship.  For these I used wire insulation with the wire taken out.  This works well because it has the hole where the cannon balls come out so it adds a little bit of realism there.  For these I drilled into the side of the ship and glued them into place.  That to me is the simplest way to add cannons to a ship of this scale.

 I also used a more complicated method for the cannons on deck.  Unfortunately I ran out of room on deck or I would have added more.  In any case for this method I used a dremel to sand down a tooth pick into the shape of a cannon.  The simplest way to explain it is sand down the middle section and then round off one end and keep the other end straight.  This takes time and patients as well.  It is hard to hold and sand such small parts so take your time and work with it.  
 The next part is to make the base of the cannon.  Cut out a small rectangular piece of wood and glue two toothpick sections for the wheels.  Then glue the cannon on top.


 This picture just shows the cannon on the deck of the ship.  The other cannon will soon be glued down on the other side.


Thank you for reading I hope this has been informative.  I will be posting more on Ships in Bottles and this particular build later.  If this blog has inspired you to build your own SIB please email me a picture at siemensbottelingco.gmail.com.  I would love to start a followers gallery and show off your work.  Thank you again for reading.

Saturday, June 2, 2012

Coming Back...

Just a quick update to say that we will be returning in two weeks. The next post will be about how to make those special little details that go on the deck.

Until then check out the new Games page. Enjoy!