1. What is your name?
Christopher Lemke
2. Where in general are you from?
Vine Grove KY (just outside Ft. Knox & Louisville)
3. How long have you been building ships in bottles?
I began building SiBs in late 2011.
4. What got you into ship in bottle building?
I’ve been a modeler for YEARS since I was 11, my father and I built model kits side by side and still talk about our projects, when plastic kits began to skyrocket in prices I wanted to look into scratch building, a friend of mine bought me a Ship in a Bottle kit all pre cut and ready to build… from that point I was hooked.
5. What was the first ship in bottle you ever built?
A readymade “Boat in a Bottle” kit that came completer with a glass bottle, cork, pre cut hull & masts, mast hinge wire, sails, rigging line, clay for the sea, and tweezers. I named it Denise after my wife as she’s the one who would be putting up with my new hobby!

6. What was your favorite build?
My favorite so far was a build I made as a gift for my dad, I scratch built a model of the ship he served on during Viet Nam. The AKA-112 USS Tulare, I even built the LCM-3 He piloted into the bottle’s glass stopper.


7. What do you think makes your ships in bottles unique?
Unique? I’m not sure I rate ‘unique’, yet. I do really like building ‘odd’ ships that folks don’t often see, I’ve a project on the table of an 1800’s Ohio River ‘Kentucky Flat Boat’ loaded with bourbon casks.
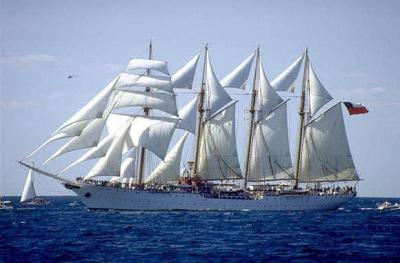
8. What types of ships do you prefer?
I love fully rigged tall ships of the Golden Age of Sail, I also enjoy Medieval Era ships, Civil War Iron Clads, I’ve even built a Viking Longship.
9. What is your favorite part of ship in bottle building?
I love the research, finding the plans, colors etc… but I really love the building, adding the details, making everything just right.
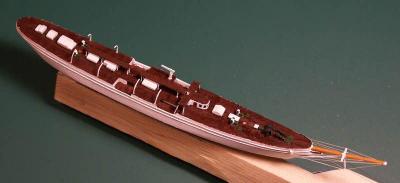
10. Is there a design or method that you use that you are particularly proud of?
I use a variable speed Dremel tool as a lathe to turn bamboo skewers down into masts, also I've become pretty accomplished in building ships where the hulls have to be split down the middle to fit into the bottle.


11. Have you had any instances where a build went horribly wrong?
Oh yes… I built a Great Lakes armed sloop, placed it into the bottle, got it all seated into the sea and glued down and while I was pulling the lines to raise the sails the bottle pulled off its stand and fell, all the weight of the bottle was hanging from the rigging lines, it broke all the masts.

12. What are some of your favorite materials to use?
Basswood for the hulls, bamboo skewers for the masts, and acrylic paints
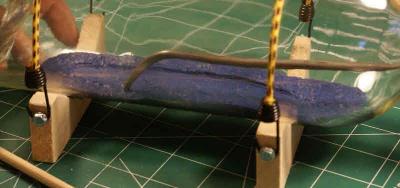
13. What are some of the most unusual materials you’ve used in a build?
So far the most unusual material has been driftwood.
14. What creative tools have you created?
I’ve made all types to graspers, micro picks, and even a hinged paint brush using 1-2mm brass tubing and rods.

15. What books do you recommend for ship in bottle building?
There are SO many! But two of the best How-to books are: Don Hubbard`s book SHIPS-In-BOTTLES and How to Build Historical Bottled Ships. The best reference: The Story of Sail by Laszlo & Woodman
16. What is the most interesting bottle you have found?
I have 2 and both have inspired their own projects, 1 is an antique 2 Gallon Jim Beam bottle, that’s what I’m building the Flat Boat in, the other is an antique glass Bayer aspirin bottle That’s going to have the Firs US Navy Hospital ship built in it.
17. What’s the most unique place or way you have found a bottle?
I hunt through flea markets and yard sales.
18. What is your favorite response to the question, “How did you get it in there?”
“Carefully, very, very carefully”
19. What ships are on your to do list?
HMS Bounty (working), Ohio River Kentucky Flat-Boat, USS Red Rover (1st US Navy Hospital Ship), NCC1701 USS Enterprise (Star Trek)
20. What are you currently working on?
2 Projects, the HMS Bounty and a commission piece for a retirement gift, a 66 Gun German/Dutch Man ‘O War pirate ship.